


DIY Project: Seal Internal Doors and Keep Comfort Where You Need It
You have closed the bathroom door, shut off the laundry and told everyone - again - to keep the hallway door closed. But there is still cold air creeping into the living area.
That is because closing an internal door does not necessarily seal it. Air can still move through the gap underneath the door and around the sides and top.
Draught-proofing internal doors helps turn a closed door into a more effective zoning boundary. It can help keep heating and cooling in the rooms you are using, rather than allowing it to wander into bathrooms, laundries, hallways, unused bedrooms or stairwells.
If you are looking for an internal door draught stopper, door bottom seal, under-door seal or a way to stop heat escaping under doors, this is the DIY project for you.
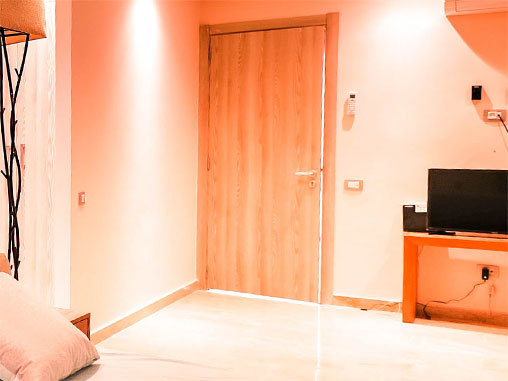
That Closed Door May Be Leakier Than It Looks
Internal doors often have a substantial gap underneath them.
This is particularly common between carpeted living areas and tiled wet areas such as bathrooms, toilets, ensuites and laundries.
Even with the door closed, warm air can escape underneath it while cold air spills back into the living area. Smaller gaps around the two sides and top of the door allow even more air movement.
That can leave your heater or air conditioner trying to manage far more of the house than you intended. Draught-proofing the bottom, sides and top of the internal door helps separate the conditioned part of the home from the unconditioned part.
In other words: it makes zoning work.
Why Internal Door Seals Are a No-Brainer
This simple DIY project uses two different types of internal door seals:
Bottom of the Door - RP2A Door Draught Excluder
The RP2A is a dense brush seal fitted across the bottom of the door. It closes the large gap underneath the door, helping stop warm or cool air escaping into the adjoining room. Because it stays attached to the door, it works every time the door is closed—without anyone having to reposition a door snake. The RP2A has a 19mm brush and is best suited to doors that open over hard flooring, such as tiles.
Sides and Top of the Door - EMV Perimeter Seal
The EMV is a slim, self-adhesive seal fitted to the door jamb. It seals the smaller gaps along the two sides and across the top of the door. Once installed, the seal is folded into a V shape so that it makes contact with the door when the door closes. Installation is straightforward: clean the jamb, measure and cut the seal, fold the seal then stick it into position and press it firmly into place.
A Seal on All Four Sides
Used together, the RP2A and EMV seal the bottom, sides and top of the internal door.
They will not make the door airtight, but they can substantially reduce air movement between the two rooms. That helps keep heating and cooling within the part of the home you are actually using.
Where Internal Door Draught Proofing Helps
Internal door sealing is particularly useful for:
- bathrooms and ensuites
- toilets
- laundries
- doors between living rooms and hallways
- doors leading to a bedroom wing
- unused or rarely used rooms
- doors separating a living area from a stairwell
- any room you do not want to heat or cool continuously
The goal is simple: zone rooms for heating and cooling so that you are not paying to condition the entire house.
What You’ll Use
The Internal Doors Draught Proofing Kit contains enough material to seal two suitable internal doors:
- 2 × RP2A door draught excluders
- 2 × EMV slimline perimeter seals
The RP2A seals underneath the doors. The EMV seals the two sides and top of each door.
Prefer to Watch?
Video 1: How to Draught-Proof the Bottom of an Internal Door with an RP2A Draught Excluder
Install the RP2A door bottom seal first.
Video 2: How to Install a Low-Cost EMV Perimeter Seal on a Door
Install the EMV around the two sides and top after the RP2A has been fitted.
Tools You’ll Need
- RP2A draught excluder
- EMV perimeter seal
- measuring tape
- pencil
- hacksaw and mitre box
- side cutters or pliers
- scissors
- alcohol wipes, or a microfibre cloth with methylated spirits
- non-metallic egg flip or thin plastic spatula
Step 1: Choose the Right Internal Door
Start with a door that separates a heated or cooled room from an area you are not trying to condition.
A bathroom, toilet, ensuite or laundry door is often ideal.
The RP2A brush seal is designed to travel over a hard surface such as tiles. Before ordering, check what happens to the floor level as the door swings open.
Step 2: Check the Sweep of the Door
Measure the gap between the bottom of the door and the floor while the door is closed.
Then slowly open the door and continue checking the gap.
If the gap becomes smaller as the door opens, the floor is rising beneath the door. A brush seal fitted too low may drag heavily, make the door difficult to operate and place unnecessary pressure on the adhesive.
The RP2A has a 19mm brush and is generally suitable when the gap beneath the door is no more than approximately 20mm. A larger or uneven gap may require a different door bottom seal. check before cutting or sticking anything to the door.
Step 3: Clean the Bottom of the Door
Self-adhesive door seals need a clean, smooth surface.
Use an alcohol wipe or a microfibre cloth dampened with methylated spirits to thoroughly clean the area where the RP2A will be fitted.
Remove dust, grease, cleaning-product residue and anything else that could stop the adhesive bonding properly.
Allow the surface to dry completely.
If the bottom of the door is rough, damaged or uneven, the adhesive may not be sufficient. The seal may need to be screw-fixed or you may need to choose a different product.
Step 4: Measure and Cut the RP2A
Measure the full width of the door and mark the RP2A.
Before cutting it, slide the brush out of the aluminium carrier. Cut the carrier and brush separately.
Trying to cut both pieces together can damage the brush and allow the bristles to fall out.
Cut the aluminium carrier with a hacksaw and mitre box. Cut the brush section separately with side cutters or pliers, following the method demonstrated in the video.
Slide the brush back into the carrier and secure the ends so that it cannot move sideways. 5: Fit the Door Bottom Seal
Hold the cut RP2A against the door and check the length and position before removing the adhesive liner.
The brush should close the gap without being crushed against the floor.
Remove a small section of liner from each end and lightly tack the seal into position. Check that it is straight and that the door can open properly.
Once you are happy with it, gradually remove the remaining liner and press the RP2A firmly onto the door.
Press along the full length twice to activate the adhesive and create a strong bond.
Open and close the door several times to make sure the brush follows the floor without dragging excessively.
Step 5: Clean the Door Jamb
The EMV perimeter seal is fitted to the jamb rather than across the face of the door.
Clean the jamb thoroughly along both sides and across the top. Pay particular attention to the upper corners, where dust is easily missed.
Allow the jamb to dry before installing the seal.
Step 6: Cut and Fold the EMV Perimeter Seal
Measure the two sides and top of the door jamb and cut the EMV to suit.
Fit the seal according to the installation video, working carefully around the corners and latch.
The EMV can be applied across the latch opening and folded into its working position after installation. Use a non-metallic egg flip or thin plastic spatula to help press the seal into tight sections without damaging it. ted, press firmly along the full length of the adhesive.
Step 7: Fix the Seal and Test the Door
The EMV works as a V-shaped seal.
After it has been stuck to the jamb, fold it along its centre so that the flexible edge makes contact with the door when it closes.
Close the door gently and check:
- that it latches properly
- that the seal contacts the door
- that there are no obvious gaps
- that the door is not excessively difficult to close
- that the RP2A travels freely across the floor
The door may feel slightly firmer at first, but it should still operate normally.
Done!
You now have a draught-proofed internal door that forms a much more useful boundary between the two parts of your home.
What to Watch Out For
Uneven Floors
A door bottom seal that works perfectly when the door is closed may drag as the door opens.
Always check the complete sweep of the door before installing the RP2A.
Large Gaps
The RP2A is not suitable for every under-door gap. If the gap is too large, choose a door draught excluder with a longer brush or another seal designed for that particular door.
Rough Door Surfaces
Self-adhesive seals require a smooth, clean surface. Rough timber, peeling paint or damaged veneer may prevent the adhesive from bonding properly.
Carpet
The RP2A is primarily intended to sweep over hard floors such as tiles. A brush dragging through carpet may make the door difficult to open and can shorten the life of the seal.
Required Ventilation
Do not draught-proof an internal door if doing so would interfere with permanent ventilation required for an open-flued or unflued gas appliance.
Bathrooms and laundries must also continue to be actively ventilated to remove moisture. Sealing the internal door does not mean sealing moisture inside the room—it means ventilating that room directly to outside rather than through the rest of the home.
Real Home, Real Difference
A well-sealed internal door can help stop:
- cold bathroom air entering the hallway
- laundry draughts reaching the living area
- warm air disappearing towards unused bedrooms
- cool air escaping from a summer living zone
- heating travelling straight towards the stairwell
- smells, light and some noise moving between rooms
The biggest benefit, however, is better control over where your heating and cooling goes.
FAQs
Can I draught-proof a bathroom or laundry door?
Yes. Bathrooms, toilets, ensuites and laundries are among the most useful rooms to zone away from the main living area.
The wet area must still have appropriate ventilation to outside.
Is a door snake enough?
A door snake or loose draught stopper can reduce air movement underneath a door, but it only works while it remains in the correct position.
A fitted under-door seal stays attached to the door and works whenever the door is closed.
Do I need to seal the sides and top?
For effective internal door draught proofing, yes.
A door bottom seal addresses the largest gap, but air can still move around the perimeter. The EMV seals the two sides and top to create a more complete zoning boundary.
Can I use ordinary foam weather stripping?
Basic weather stripping may work where the gap is small and consistent.
The EMV is a slimline V-shaped seal, making it useful where there is not enough room for thick foam or where a bulky seal would stop the door closing properly.
Can I install the internal door seals myself?
Yes. This is a manageable DIY draught-proofing project, provided the door and floor are suitable.
Watch both installation videos before starting and install the RP2A first, followed by the EMV perimeter seal.
Will internal door seals reduce noise?
They may reduce some sound, light and odour passing through the gaps, but they are not specialist acoustic seals.
Their main job is to reduce air movement and improve zoning.
Ready to Stop Heating the Laundry?
Draught-proofing internal doors is a simple way to keep warm or cool air in the rooms where it is doing some good.
Seal underneath the door with an RP2A draught excluder. Seal the sides and top with EMV perimeter seal. Close the door and make that zoning boundary work properly.