


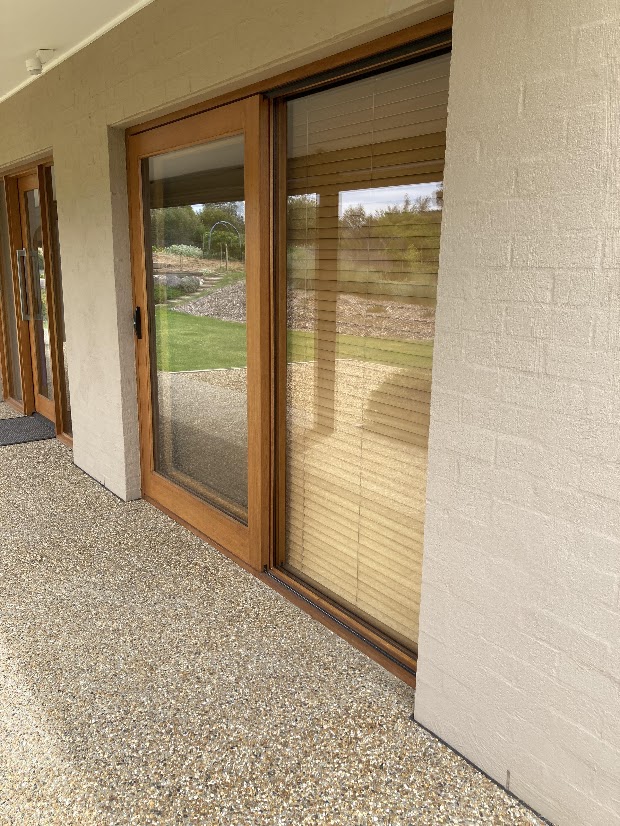
Timber sliding doors are beautiful - the gaps around them are less so.
Older timber sliding doors can bring plenty of light and character into a home. They can also bring in a surprising amount of outside air.
Unlike a standard hinged door, a sliding door needs space around it so it can move along its track. The rollers hold it above the threshold, the guide at the top must remain loose enough for the door to operate, and the trailing edge passes across the fixed glass panel beside it.
All of those necessary moving parts create opportunities for draughts. The good news is that many timber sliding doors can be substantially improved. The less convenient news is that they are highly individual doors. There is no single strip of foam you can stick around the frame and declare the job finished.
This project will help you identify each leaking edge and choose the right treatment for it.
Before You Start: Check That the Door Works Properly
Draught proofing will not repair a door that is already difficult to operate. Before fitting any seals, check that the door:
- moves smoothly along the track
- sits reasonably straight
- closes fully
- latches without excessive force
- does not have badly worn rollers
- is not rubbing heavily against the frame
Most timber sliding doors run on wheels fitted beneath the door. If those wheels are worn or poorly adjusted, repair them before adding draught-proofing components. The seals should not stop the door working properly. They will also not magically improve a door that already needs mechanical repair.
Meet Your Timber Sliding Door
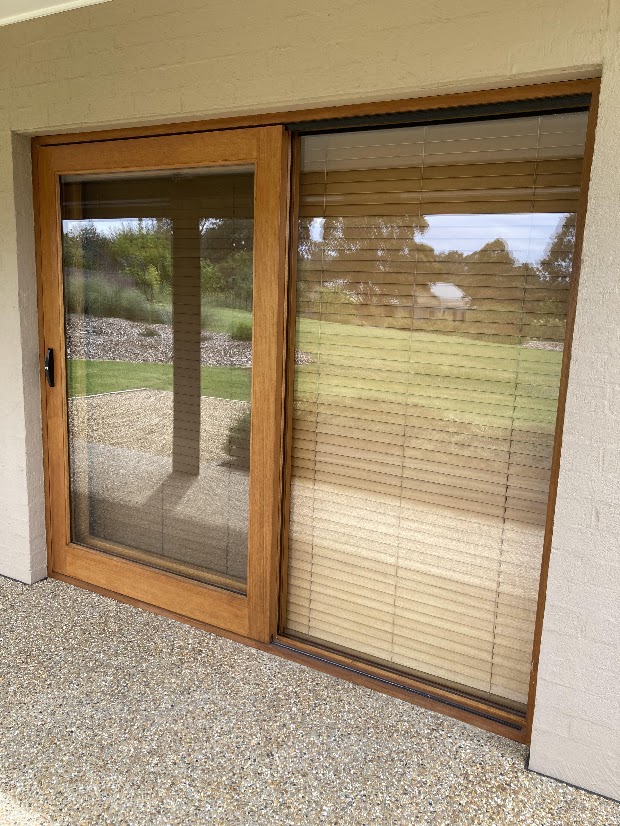
Most external timber sliding doors move across a fixed glazed panel called a sidelight. The sliding door usually runs outside the sidelight, with the flyscreen running on the inside. Some doors are arranged in the opposite direction, so inspect yours carefully before choosing or fitting any seals.
For draught-proofing purposes, the sliding door has four important edges:
The latch side
The edge that closes against the frame and contains the latch.
The trailing edge
The back edge of the sliding door, where it overlaps the fixed sidelight when closed. This is usually the most difficult part to seal.
The head
The top of the door and its guide or channel.
The tread
The bottom of the door, including the track and threshold.
Each edge behaves differently and generally needs a different solution.
The Three Rules of Timber Sliding Door Draught Proofing
1. Do not make the latch difficult to use
Adding thick weather stripping inside the latch-side jamb may prevent the door from closing far enough to latch. Seal gently against the face of the door rather than stuffing thick foam into the closing gap.
2. Do not put too much pressure on the bottom
A brush can be used to seal the lower edge, but it should touch the door gently. Too much outward pressure can make the door harder to move and place unnecessary load on the runner wheels.
A longer, softer brush pile is generally better than a short, stiff brush that presses firmly against the door.
3. Expect the trailing edge to be complicated
The trailing edge is where the moving door overlaps the fixed sidelight. Timber doors often bow slightly, leaving a larger gap around the middle than at the top or bottom. A brush may touch at each end while missing the centre completely. This edge usually needs the most careful inspection and may require a solution designed specifically for your particular door.
Step One: Draught-Proof the Head
The right treatment depends on the type of guide fitted above the door.
T-Shaped Top Guide
Some timber sliding doors have a T-shaped guide fixed to the head of the frame. The vertical section of the T runs through a slot in the top of the door. The slot must remain loose enough for the door to slide and to be lifted out for maintenance, so it can also leak air.
The usual solution is to fit a brush seal to the head of the jamb so that the brush pile rests gently against the face of the door. The aluminium carrier should be screw-fixed into the timber jamb. The brush should make contact without pushing firmly against the door.
Channel Top Guide
Other doors run beneath a channel suspended from the head of the jamb. This arrangement can be considerably draughtier. Plastic guides or bumpers may keep the door roughly centred, but there can still be substantial gaps around the channel.
There are two possible approaches.
Fit a brush below the channel
This may require packing out the head of the jamb until the mounting surface is level with or slightly beyond the channel. It can work well, although getting a neat-looking result may take some care.
Fit EMV Slim Line Seal inside the channel
A low-profile V-seal such as EMV Slim Line Seal can sometimes be fitted inside the channel itself. It is usually easier to attach the EMV to the fixed channel rather than to the moving door. Clean the inside of the channel thoroughly, cut the EMV to length, fold it into its V shape and fit it with the point of the V facing down. Removing the door first may make the channel much easier to access.
Step Two: Draught-Proof the Tread
The bottom of a timber sliding door is often one of its largest leakage points. The door must sit above the track on its runner wheels, which leaves a substantial gap beneath it. The most practical treatment is usually a brush seal mounted flat on the threshold so that the brush pile rests gently against the lower face of the door. A long-pile brush such as the RP15 can provide good contact without making the door unpleasant to operate.
Installation principles
- Position the brush where it will touch the face of the closed door.
- Keep the contact light.
- Make sure the seal does not interfere with the track or rollers.
- Screw-fix the aluminium carrier to the threshold.
- Do not rely only on adhesive, because this area will be walked on and regularly disturbed.
Open and close the door several times before completing the installation. It should continue to move freely.
Step Three: Draught-Proof the Latch Side
The latch side is where the door closes against the frame. It may be tempting to apply self-adhesive foam tape inside the jamb. This usually creates more problems than it solves. Once the foam is compressed between the door and frame, the door may no longer close far enough to latch properly. The better approach is to seal against the face of the closed door.
A timber Draught Dodger fitted to the side of the jamb can hold a compression seal in the correct position. The seal should just touch the door when it closes, rather than being heavily crushed. The fitting packer supplied with Draught Dodgers helps position the seal accurately. You may need to stop and restart the Draught Dodger around the latch hardware. A single length of Draught Dodger can be used for this side rather than purchasing a complete hinged-door set.
Step Four: Deal with the Trailing Edge
The trailing edge is usually the chief culprit. It is the gap between the back of the sliding door and the fixed sidelight when the door is closed. Stand beside the closed door and look along this overlap.
You may find:
- an existing brush that no longer reaches
- no brush at all
- a visible gap through to outside
- a door that bows away from the sidelight
- a gap that changes significantly from top to bottom
There are several possible treatments.
Situation One: There Is an Existing Brush, but It Does Not Touch
The brush may be fitted into the back of the sidelight or into the rear edge of the door. Often, it touches near the top and bottom but misses the middle because the door has bowed. Rather than adding more outward pressure, fit an opposing seal that meets the existing brush when the door closes.
For example, where the existing brush is fitted to the sidelight:
- Stand outside with the door closed.
- Slide a ruler between the rear edge of the door and the sidelight until it touches the existing brush.
- Record that measurement.
- Repeat the measurement approximately every 300 mm down the height of the door.
- Remove the door from the track.
- Clean the rear surface of the door.
- Transfer the measurements onto the back of the door and draw a fitting line.
- Install a good-quality self-adhesive brush such as RP48 or RP61 along that line.
- Refit the door and check that the new seal meets the existing brush when the door closes.
Test a short piece first. A few millimetres of incorrect positioning can determine whether the two brushes meet properly or miss each other entirely.
Situation Two: There Is No Existing Brush, but the Door Projects Beyond the Sidelight
When the door is closed, part of its trailing edge may remain visible from inside the room. Where this occurs, a brush seal can sometimes be fixed to the edge of the sidelight so that the pile rests gently against the back edge of the closed door. Check the gap at several heights before selecting the brush length. Timber doors may not sit perfectly straight.
Situation Three: The Sidelight Timber Is Visible from Outside
Stand outside with the door closed. Where part of the sidelight’s timber frame or glazing bead remains visible beside the trailing edge, a sweep seal may be fitted to the back edge of the sliding door so that it seals against that timber. Screw-fixed sweep seals such as RP5 or RP26 may be suitable. You may need to trim the rubber at the top and bottom so it clears the surrounding frame and track. Check that the sweep does not catch as the door opens.
Situation Four: Fit Brushes to Both Surfaces
Another option is to install a self-adhesive brush such as RP61 on both:
- the sidelight, and
- the trailing edge of the sliding door
The two brushes meet when the door closes. This usually requires removing the door to gain access to the back edge. Again, test the position with short pieces before installing full-length seals.
What About Double Timber Sliding Doors?
Double sliding doors that meet in the centre are particularly difficult to draught proof. Adding seals to the meeting point can prevent the doors from closing and latching correctly. There may not be a simple standard DIY solution.
Treat the head, tread and outside edges where practical, but assess the centre join very carefully before adding any seal. The doors must still close, align and latch without excessive force.
Test the Door Before You Finish
After fitting each component:
- Open and close the door several times.
- Check that it still rolls smoothly.
- Confirm that it closes fully.
- Test the latch.
- Look for any seal catching on the track or frame.
- Check that brushes are touching gently rather than pushing firmly.
- Test again for moving air on a windy day.
Do not fit every component first and test the door at the end. Timber sliding doors vary too much for that approach. Work one edge at a time.
What You May Need
The exact products depend on the door, but possible components include:
- a long-pile brush such as RP15 for the tread or head
- EMV Slim Line Seal for some channel-style top guides
- a single Draught Dodger length for the latch side
- RP48 or RP61 self-adhesive brush for the trailing edge
- RP5 or RP26 sweep seals where the trailing edge can seal against exposed timber
- screws suitable for fixing aluminium seal carriers into timber
- cleaning cloths
- a tape measure and ruler
- a pencil
- a fitting packer
- tools required to remove and refit the door, where necessary
Do not order seals based only on the overall door dimensions. Inspect each leaking edge first.
When to Ask for Help
Timber sliding doors were built in many different ways. Your door may slide inside rather than outside the sidelight. The channel may be unusual. The door may be bowed, the overlap may be too small, or the latch may leave no room for an additional seal.
When your door does not match the arrangements described here, send ecoMaster clear photographs (and video!) showing:
- the complete closed door from inside
- the head
- the tread and track
- the latch side
- the trailing-edge overlap from inside
- the trailing-edge overlap from outside
- any existing brushes or seals
The more clearly we can see how the door moves and where the gaps occur, the better chance we have of identifying a workable solution.
Draught-Proof the Door You Actually Have
Timber sliding doors are not impossible to draught proof. They are simply not standard. The best results come from treating the door as four separate problems:
- seal the head without interfering with the guide
- seal the tread without loading the rollers
- seal against the face at the latch side
- carefully match the trailing-edge solution to the actual overlap
Take your time, test each component as you go and resist the urge to solve every gap with thick foam tape. Your sliding door should finish the project less draughty. It should not finish the project requiring a wrestling match every time somebody wants to go outside.
Recent Comments