


Table of Contents
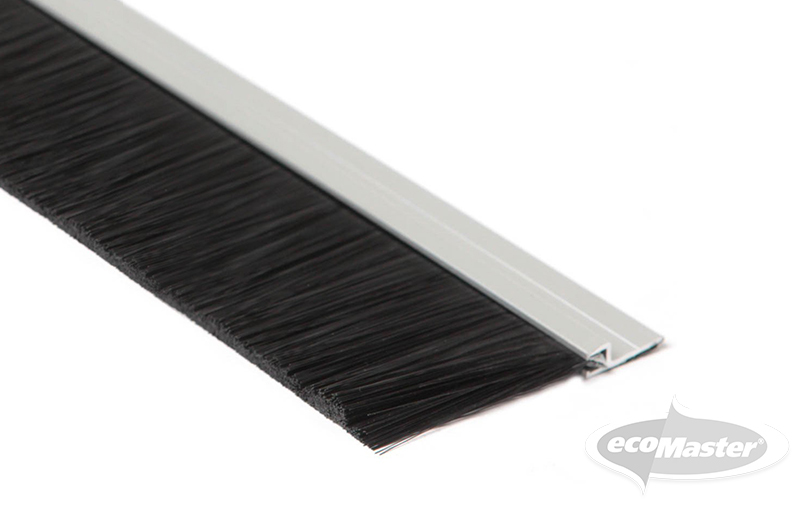
Hey there, handy folks! Are you ready to tackle a little project that’ll make a big difference in your home? If you’re looking to install a door brush—whether to keep out drafts, dust, or the mysterious creatures that dwell in the shadows (we’re looking at you, dust bunnies)—we've got all the tips and tricks to ensure you do it right the first time. Let’s dive into the do’s and don’ts of door brush installation!
Choosing the Right Brush
Before we dive into the installation steps, let’s pick the perfect brush for your door.
Go to this link to find the 4 most commonly used brushes; there’s even a handy Brush Door Seals PDF Draught Proofing Guide to download if you wish.
Materials Needed
- Door brush (already measured and ready to go!)
- Drop saw or a miter box with a hacksaw
- Measuring tape and a pencil (for those precise cuts)
- Pliers or side cutters (to handle the tough bits)
- Hammer and fitting packer (for a snug fit)
Video
Step-by-Step Guide:
- Measure Twice, Cut Once: Grab your measuring tape and pencil, and double-check those measurements on your door brush. Remember, accuracy now means perfection later.
- The Right Cut: Before you make the cut, here’s a golden tip—remove the brush from its carrier! Why, you ask? Cutting them together can lead to a brush apocalypse, where the pile just keeps falling out. Trust us; it’s a mess!
- Snip and Crimp: Use your pliers or side cutters to cut the brush, then crimp the end of the steel part that holds the brush together. This little step is crucial—it stops the brush pile from staging an escape!
- Inserting the Brush: Now, let’s slide the brush into the carrier. Avoid the snaky wiggle that the instructions might suggest—unless you want to stress out the adhesive with unnecessary tension. Instead, lay the carrier flat, insert the brush to the end, and make sure it’s slightly shorter than the carrier for a perfect fit.
- Securing the Edges: Time to secure the ends! Place the carrier on your fitting packer and give the back corner a firm tap with your hammer. Just one good whack should do—no need for Hulk strength here. Flip and repeat on the other end to ensure your brush is locked in and lined up.
- Final Checks: Give everything a once-over. The carrier should look pristine (no battle scars here!), and the brush should sit tight, ready to guard your door against all elements.
There you have it—a door brush installed with precision and care, ready to face the elements (or just the hallway drafts). Not only is your door now spiffy and draft-free, but you've also got the know-how to make any door in your home just as neat. So go ahead, give yourself a pat on the back, and enjoy the swoosh-free silence of a well-done job!
People Also Ask:
⇒ Where can I learn more about this from an industry expert?
ecoMaster has been working in the energy efficiency / retrofit arena for over 20 years. During that time we learnt an enormous amount about diagnosing issues, distinctions on various products as well as developing the best installation practices. We have done the research, so you don't have to. All that information has now been condensed into a series of ecoMasterClasses. Click here to gain access.
⇒ What tools do I need for installing a brush onto a door?
The necessary tools include a drop saw, mitre box, hacksaw, measuring tape, pencil, pliers, side cutters, hammer, and a fitting packer.
⇒ Can I cut the carrier with the brush inside?
No, cutting the carrier with the brush inside can cause the brush pile to fall apart. It is recommended to use pliers or side cutters to cut the carrier without damaging the brush.
⇒ How do I measure and cut the carrier to the desired length?
Measure the carrier length according to your door's dimensions and cut it using side cutters or pliers. Remember to cut the carrier without the brush inside.
⇒ How do I securely attach the brush to the carrier?
Instead of pushing the brush into the carrier, crimp the end of the carrier to firmly hold the brush in place. This ensures a more secure attachment.
⇒ How do I crimp the carrier to hold the brush?
First, insert the brush into the carrier until it reaches the end. Pull it out slightly, level it, and then snip off the excess brush. The brush should be slightly shorter than the carrier. Place the carrier flat on the fitting packer and hammer the back corner to create a crimp that holds the brush securely. Repeat the process for the opposite end of the carrier.
⇒Why is crimping important for a strong bond?
Crimping the carrier ends prevents the brush from coming loose when the door opens and closes. It also allows the adhesive to form a solid bond with the door surface, ensuring maximum effectiveness.
⇒ What are the benefits of installing a brush onto a door?
By installing a brush onto a door, you can effectively seal against draughts, improve energy efficiency, and create a more comfortable environment in your home or office.
What’s Next?
We hope this article has helped you learn how to cut the brush seals on your door. This in turn will help you on your energy and thermal efficiency retrofit journey to make your home more comfortable all year round, and reduce your costs and carbon emissions.
Next, explore Windows and Pelmets
If you found this article helpful, then please subscribe to our YouTube Channel. You’ll find many more helpful “How To” videos there. You can also follow us on Facebook and Instagram to stay in the loop. For more great information on how to make your home more energy and thermally efficient subscribe NOW to ecoBites. ecoBites are free bite size chunks of the latest energy efficiency information making it quick and easy for you to absorb.
Recent Comments